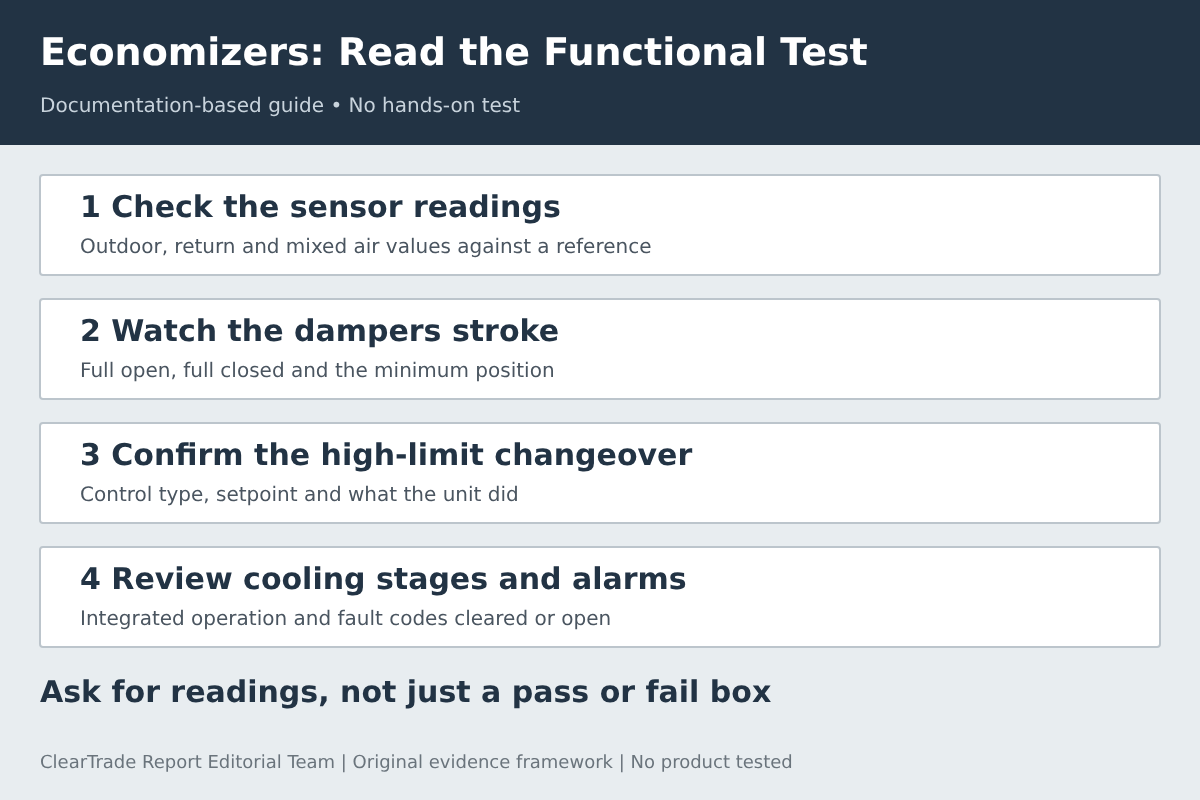
An economizer service report is useful only if it shows the unit running through its outdoor-air sequence. Ask for the sensor readings with a reference reading beside them, the changeover or high-limit type and setpoint, the damper position in each forced mode, the minimum outdoor air setting, how the compressor stages behaved with the economizer open, and the controller’s alarm list. If a report recommends repairs without that evidence, ask for the test results before you pay. A passing test shows the sequence worked that day. It does not prove any energy saving.
Evidence label: Documentation-based guide. ClearTrade Report Editorial Team checked California Energy Commission acceptance test and fault detection documents, an Energy Code Ace explanation of the acceptance test, a National Renewable Energy Laboratory technical report, and two economizer controller manuals on November 5, 2026. No hands-on testing, site visit or outside professional review was performed. Products and organizations named below are documentation examples, not recommendations. This guide contains no affiliate links.
What an economizer functional test should prove
The Energy Code Ace explanation of the California Energy Commission’s acceptance test for air economizer controls, known as NA7.5.4, states the goal in one line: “Functionally Testing an air economizer cycle verifies that an HVAC system uses outdoor air to satisfy space-cooling loads.” The Commission’s 2022 acceptance testing overview lists the related form as “Economizer controls (MCH-05).”
Even outside California, it is a useful public outline. The 2019 version works through forced modes in order:
- Economizer enabled with a cooling demand: “Economizer damper is 100 percent open and return air damper is 100 percent closed.”
- Economizer disabled with a cooling demand: “Economizer damper closes to its minimum position.”
- Heating demand, if the unit heats, with the economizer able to operate: “The economizer is at minimum position.”
- Unit off: “Economizer damper closes completely.”
The procedure ends with a restore step: “Restore demand control ventilation systems (if applicable) and remove all system overrides initiated during the test.”
This guide covers one sequence at one point in time, not long-term trend monitoring.
Sensor readings: outdoor, return and mixed air
The controller acts on its sensors, so bad readings can make a sound damper look broken. California’s economizer fault detection rules (Joint Appendix JA6.3) require permanently installed outside air, supply air and return air sensors, the last one “when required for differential economizer operation.” They also set an accuracy target: “Temperature sensors have an accuracy of ±2°F over the range of 40°F to 80°F.”
Where the outdoor sensor sits matters too. NA7.5.4 includes a construction check that “Economizer lockout control sensor is located to prevent false readings.”
The Energy Code Ace explanation lists a “Hand-held temperature probe (must be calibrated within the past year)” as test equipment. On a Honeywell JADE controller, the status menu shows “OA TEMP,” “MA TEMP” and “RA TEMP.” Ask for each controller reading beside a handheld reading taken at the same time and place.
Changeover and high-limit setpoint
The high limit, or changeover, setting tells the controller when outdoor air is too warm or humid to use. The Belimo ZIP Economizer manual lists changeover choices including “Fixed dry bulb,” “Differential dry bulb,” “Fixed enthalpy + Fixed dry bulb” and “Diff enthalpy + Fixed dry bulb.” The Honeywell JADE manual lists a “DRYBLB SET” setting with a default of 63ºF and a range of 48 to 80 ºF.
A default is not necessarily right for your building. The 2019 NA7.5.4 text says “Economizer high limit shutoff control complies with Table 140.4-E of Section140.4(e)2,” and for fixed dry-bulb or fixed enthalpy plus fixed dry-bulb controls, “it shall have an adjustable setpoint.” Your report should state the control type, the setpoint found and left, and the reference it was checked against.
Damper stroke and minimum outdoor air position
The damper must travel its full range on command. On a JADE controller, the checkout menu includes “DAMPER OPEN,” which “Positions damper to the full open position,” and “DAMPER CLOSE,” which “Positions damper to the fully closed position.” The Belimo ZIP manual describes a “Manual Override1- Devices” function used “to verify RTU integrated components in manual operation.”
A report that just says “damper OK” is weak evidence. Ask for the commanded and observed position at full open, full closed and minimum.
The minimum position supplies ventilation air when the unit is not economizing. On the JADE, “MIN POS” has a default of 2.8 V and a range of 2 to 10 Vdc, and it “Displays ONLY if a CO2 sensor is NOT connected.” With a CO2 sensor, “VENTMIN” and “VENTMAX” settings are used instead. Ask what minimum position was found and left, and what ventilation target it serves. A voltage or percentage alone does not tell you the airflow.
NREL’s report “Analysis of Fault Data Collected from Automated Fault Detection and Diagnostic Products for Packaged Rooftop Units” found that, of the damper faults it charted, “59% of the time the outside airflow is less than expected,” “24% of the time the damper is not modulating properly,” and “16% of the time the damper is stuck in the closed or minimum outside air position.”
Cooling stage integration
The Energy Code Ace explanation of NA7.5.4 says that for unitary systems of 65,000 Btu/hr or less, inspectors verify that a two-stage thermostat is used and that the system is wired so that “the economizer is the first stage of cooling and the compressor is the second stage.” Its acceptance criteria add: “The outdoor air damper is 100 percent open before mechanical cooling is enabled” and “For unit controls, the outdoor air damper may not begin to close until the leaving air temperature is below 45°F.”
On the JADE, “ECONOMIZING” reads “YES = Outdoor Air being used for 1st stage cooling,” and separate items show the first and second stage cooling inputs and outputs (“COOL Y1-IN,” “COOL Y1-OUT,” “COOL Y2-IN” and “COOL Y2-OUT”). Ask for these readings during a forced cooling call with the economizer enabled.
Fault alarms and status screens
California’s JA6.3 requires certified economizer fault detection and diagnostics (FDD) to detect these faults: “Air temperature sensor failure/fault,” “Not economizing when it should,” “Economizing when it should not,” “Damper not modulating” and “Excess outdoor air.” It also requires the controller to show “The current value of each sensor” and status items such as “Economizer enabled” and “Compressor enabled.”
Under JA6.3, faults can be sent “To an Energy Management Control System regularly monitored by facility personnel,” shown on or near the zone thermostat, or sent to a fault management application. The JADE manual lists alarms such as “OA SENS T ERR,” “MA T SENS ERR,” “ACT STALLED” and “SYS ALARM.” It notes: “Alarms display only when they are active.” The Belimo ZIP has a “Historic Alarms” menu.
Ask for a photo or printout of active and historic alarms before anything is cleared. NREL’s report recommends that when an FDD system reports a fault with numbers attached, it should “report the out of range value and the desired set point associated with the fault.” That is a good standard for a service report too.
Report item table: what to ask for
| Report item | What a complete entry shows | What to ask for if it is missing |
|---|---|---|
| Damper stroke | Commanded and observed position at full open and full closed; return damper position in each mode | Results of the controller’s damper open and close checkout |
| Minimum outdoor air position | Setting found and left, in the controller’s units, and the ventilation target it serves | The setting and how the target was chosen |
| Outdoor, return and mixed air sensor readings | Controller reading beside a handheld reference reading, same time and location | Reference instrument used and its calibration date; outdoor sensor location |
| Changeover or high-limit setpoint | Control type (dry bulb, differential, enthalpy), setpoint found and left | Which code table or document the setpoint was checked against |
| Cooling stage integration | Damper position and compressor stage status during a forced cooling call with the economizer enabled | Status readings for economizing and each cooling stage |
| FDD alarms and status | Active and historic alarms before clearing; where alarms are reported | A photo or printout of the alarm list and a note of any alarm cleared |
| Restore step | Initial settings recorded and returned after overrides | A before and after list of changed settings |
The last column is our suggestion, not a code or manufacturer requirement.
Before you approve a repair
Match each repair to a failed test step. Our suggestion: ask which test result points to a new actuator, such as a damper that did not stroke or a stalled-actuator alarm. Likewise, ask which reading disagreed with the reference before paying for a new sensor. If a report recommends a full economizer replacement, ask which steps failed.
Economizer problems are common. NREL reported that “Economizer faults were the most common fault from the first AFDD company.” Common is not the same as shown, though. Ask for a retest after the repair using the same steps, so you can compare before and after. For a broader list of items to expect in any HVAC service or startup paperwork, see our HVAC commissioning report checklist.
Know the limits of this guide
Evidence label: documentation-based guide. ClearTrade Report Editorial Team checked the sources below on November 5, 2026. We did not test any economizer or controller. The California procedures we read are from the 2016 and 2019 code cycles; California has adopted later editions, so check the current acceptance forms and setpoint tables for your permit. We did not read ASHRAE Standard 90.1 and do not describe it here. California acceptance tests for lighting controls and HVAC must be done by a “Certified acceptance test technician (ATT),” according to the Commission’s overview.
Primary references checked November 5, 2026: California Energy Commission, “2019 Nonresidential Appendices,” Appendix NA7.5.4 Air Economizer Controls Acceptance; California Energy Commission, “JA6.3 Economizer Fault Detection and Diagnostics Certification Submittal Requirements” (2019 Joint Appendices); California Energy Commission, “2022 Energy Code: Acceptance Testing” overview; Energy Code Ace, Reference Ace 2016, “13.8. NA7.5.4 Air Economizer Controls Acceptance”; National Renewable Energy Laboratory, “Analysis of Fault Data Collected from Automated Fault Detection and Diagnostic Products for Packaged Rooftop Units,” NREL/TP-5500-77077 (September 2020); Honeywell, “JADE Economizer Module” Installation Instructions, form 63-2700-11 (distributor-hosted copy); Belimo, “ZIP Economizer” installation and operation manual.
Frequently asked questions
What should an economizer functional test report include?
It should show the damper position in each forced mode, sensor readings beside a reference reading, the high-limit type and setpoint, the minimum outdoor air setting, compressor stage behavior with the economizer open, the alarm list, and a note that settings were restored after the test.
Is a controller’s default high-limit setpoint correct for my building?
Not necessarily. A default is a factory starting point. California ties the allowed high-limit setting to a table in its energy code. Ask the technician which code table or document the setpoint was checked against.
Should I let the technician clear economizer alarms?
Ask for a photo or printout of active and historic alarms first. Some controllers only display alarms while they are active, so a cleared alarm may leave no trace on the screen that you can review later.
Does a passing economizer test prove energy savings?
No. A passing test shows the outdoor-air sequence worked on the test day. None of the documents we checked support a savings figure for a specific repair, so ask how any quoted savings were calculated.
Disclaimer: This guide is general information based on state energy code, national laboratory and manufacturer documentation, not professional HVAC, energy or code compliance advice for a specific building. Follow the manufacturer’s installation and service instructions and the energy code adopted where you are. AI tools assisted with drafting. ClearTrade Report Editorial Team checked the cited sources and edited this guide. No hands-on testing was performed.
Need a qualified professional?
Trusted Pros uses visible license-verification states and never ranks paid listings above unpaid listings.