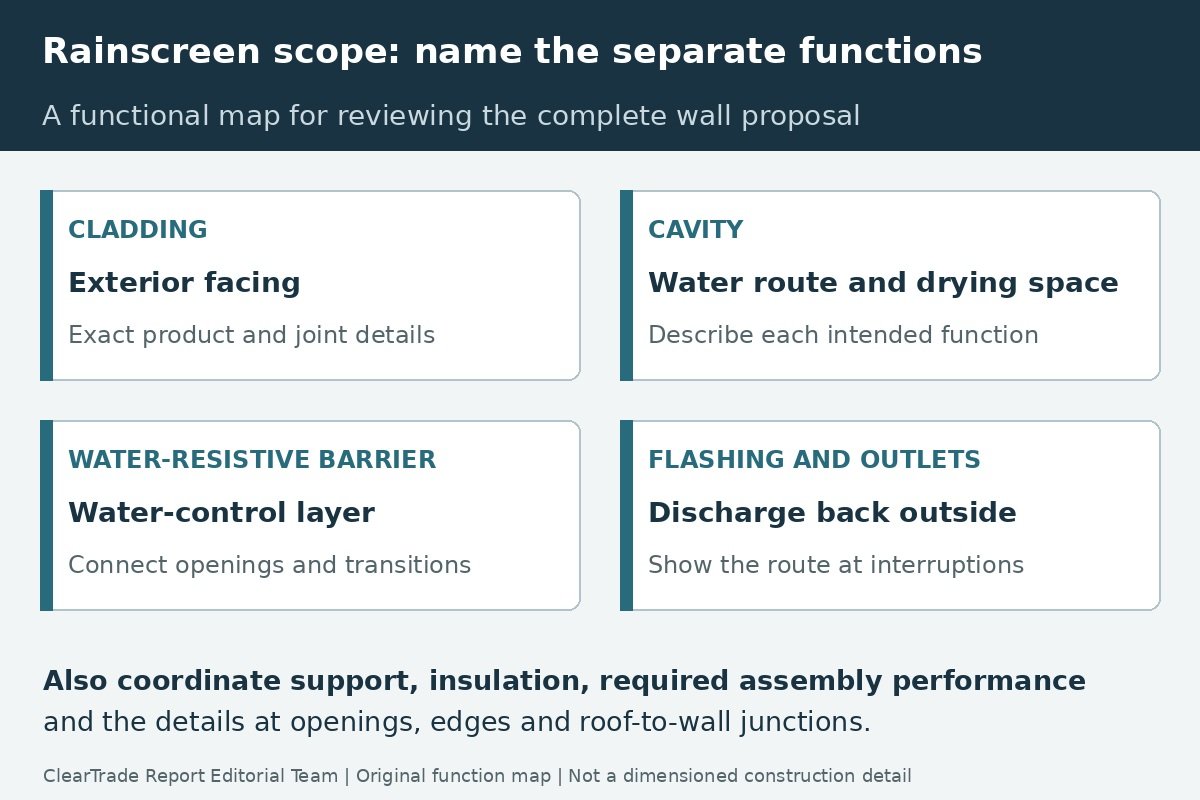
A rainscreen proposal should describe more than siding installed over a spacer. Ask it to identify the cladding, the space behind it, the water-resistive barrier, how water exits, the attachment system and the details at openings and transitions. The useful question is whether those parts form a coordinated wall assembly for the actual building.
This explainer helps owners and remodelers review that scope. It does not select a universal cavity depth, design fasteners or approve a fire-rated assembly. No ClearTrade wall opening, site inspection or performance test was performed.
Separate the exterior finish from the water-control route
Cladding is the exterior facing. A water-resistive barrier, often abbreviated WRB, is a separate water-control component behind it. A drainage space provides a route for water that passes the cladding to reach an outlet. Flashing connects that downward route to a discharge back outside rather than into another part of the building.
The PNNL drainage-plane guide describes water management behind exterior cladding and integration with openings and flashing. Its companion base-of-wall guide explains the role of an air space and a drainage outlet. Use those relationships to read the proposed wall section; a brand name on a roll of wrap does not show how the completed route works.
Ask the provider to draw or identify the route at a representative wall and at the difficult junctions. Where does water arriving behind the cladding go? What happens when that route meets a window, an equipment penetration, a horizontal trim band or the bottom of the wall? A complete answer needs the transitions as well as the middle of an unobstructed wall panel.
Distinguish drainage, capillary separation and ventilation
Drainage describes liquid water leaving under gravity. A capillary break separates surfaces that could otherwise transfer water across contact or a very small separation. Ventilation concerns air movement in the space and its contribution to drying. These are related functions, but documenting one does not establish the performance of all three.
John Straube explains those distinctions in Building Science Corporation digest BSD-013, dated August 22, 2011. The digest distinguishes the gap needed for a drainage path from an air space intended to support capillary separation or appreciable airflow. It also discusses pressure moderation; a generic spacer should not be treated as proof of a designed pressure-equalized wall.
The 2009 Straube and Smegal drainage-and-drying report notes that drainage does not remove all water retained on surfaces or in materials. Its research is a reason to ask how the complete assembly dries, not a measured drying rate for your building or a test of the products in your quote.
When a proposal says “vented,” ask where the intended openings are, how the air path is maintained and which details support that description. When it says “drainable,” ask for the water route and outlet. Keep the terms attached to evidence instead of accepting them as interchangeable marketing labels.
Read the wall as a coordinated set of functions
| Assembly item | What the proposal should explain |
|---|---|
| Exterior cladding | Exact product, orientation, joints and applicable installation documents |
| Cavity or spacer | Intended drainage and drying functions; how the space remains usable |
| Water-resistive barrier | Exact material and its connections at seams, openings and transitions |
| Flashing and discharge | How collected water is directed outside at each relevant interruption |
| Support and attachment | What carries the cladding and how attachment is justified for the wall |
| Openings and edges | Compatible terminations, screens, trims and clearances where required |
| Other control layers | Coordination with insulation, air control and the rest of the enclosure design |
A single drawing may not show every condition. Request a detail list that identifies which standard details apply and where a project-specific response is required. Keep unresolved existing conditions visible, particularly on a recladding project where the substrate has not yet been exposed.
This scope review is different from temporary weather protection during construction. A permanent rainscreen does not, by itself, define how the building will be protected while old cladding is removed or before new flashing is complete. The contractor should address that sequencing in the project plan without substituting it for the final assembly design.
Choose cavity and drainage details from the applicable documents
Avoid taking one gap dimension from an internet illustration and applying it to every cladding. Material, product, orientation, exposure, building type and the intended wall arrangement affect which instructions need to be used. Ask the provider to cite the source and show why it applies to the proposed product and project.
As a documentation example, James Hardie Exterior Wall Drainage Requirements for Multifamily and Commercial Projects is marked effective April 11, 2022. It addresses specified flat-to-wall products and includes region-dependent approaches and exceptions. Its rainscreen detail calls for a cavity of at least 3/8 inch, but that is an example within the scope of that document, not this article prescribing a minimum for all walls.
The same guide distinguishes drainage-wrap approaches from a furring-created cavity and directs users to confirm compatibility with the wrap manufacturer. It is not permission to substitute any drainage mat, wrap or spacer that appears similar. Its historical code references and document date should remain attached to the example.
For an actual project, obtain the applicable current product instructions through the manufacturer technical-document route and resolve scope or revision questions with the responsible provider. This review did not establish that the 2022 example is the latest applicable instruction for every product or location in 2026.
Trace the route through openings and interruptions
Ask for the details at window and door openings, service penetrations, base and top terminations, changes in cladding and horizontal interruptions. Identify which contractor supplies and installs each component, and who confirms that adjoining work is compatible before it is concealed.
A screen or closure needs to serve the specified purpose while respecting the intended water and air paths. A decorative trim or support must be considered in that route rather than added later without review. Do not assume a visible gap below one panel proves that the space remains continuous through the entire elevation.
Pay particular attention where roofs meet walls. The kick-out and step-flashing guide explains why a roof-water detail can affect a wall repair scope. Keep that roof-to-wall connection coordinated with the WRB and cladding work instead of treating it as an unrelated cosmetic finish.
Ask what the team will photograph or inspect before covering the important junctions. The record should identify the elevation and location, the applicable detail and any approved change. A collection of close-up images without location or sequence may be difficult to interpret later.
Coordinate attachment, insulation and required assembly performance
A drainage concept does not establish the attachment design. Ask the provider to identify the supporting substrate, furring or other support, fastener basis and applicable loads. If exterior insulation is included, the cladding support and water-control details need to address that actual arrangement rather than a drawing for a different wall.
Also identify who resolves the relevant fire, energy and local approval requirements. Obtain the applicable assembly evidence and confirm its scope before accepting a claim that a product attribute proves the entire wall complies. This article does not approve a material substitution or extend a test result to an untested arrangement.
Keep WRB, insulation, air-control and vapor-control decisions coordinated with the enclosure design. A cavity behind cladding does not define the complete air barrier, interior vapor-control strategy or building ventilation system. Ask the designer to state which layer performs each required function and how the transitions are handled.
If the quote leaves those matters to others, name those parties and make their decisions dependencies in the schedule. “By others” should identify a real responsibility, not conceal a missing design task until the siding crew is ready to start.
Compare quotes using the same detail schedule
| Scope item | Evidence to request before comparing prices |
|---|---|
| Existing wall | What has been assessed and which concealed conditions remain unknown? |
| Product identity | Cladding, WRB, spacer or furring, flashings and accessories |
| Document basis | Applicable instructions, revisions and project-specific details |
| Water and air paths | Drawings for the field of the wall and its interruptions |
| Attachment | Responsible party and documented basis for the actual support arrangement |
| Coordination | Openings, roof-wall junctions, insulation and other required assembly performance |
| Verification | Who checks critical work before covering and records changes? |
| Handover | Final detail set, product records, warranty documents and maintenance guidance |
Separate a defined scope from an allowance for repairs discovered after removal. Ask how changed conditions will be recorded, priced and authorized. An unresolved substrate condition should not disappear from the comparison simply because both quotes call their installation a rainscreen.
Compare the proposed result as well as the material quantity. One quote may include a complete junction detail and another only a spacer in the wall field. Ask for the missing item or a clear exclusion so the owner can understand what remains to be resolved.
Preserve evidence before the wall is covered
Agree on inspection or review points before installation progresses past the details that matter. Identify who can accept changes, which records are required and how corrected work will be checked. A promised photo folder is useful only if someone knows which conditions it must document.
At handover, retain product identities, applicable instructions, the final detail set, approved changes and location-labeled photographs or inspection records. Keep the issued warranties and maintenance directions rather than relying on a brochure about general durability.
For later work, provide those records to the contractor before adding penetrations, replacing openings or changing cladding. That gives the next team a basis for preserving the intended routes and connections. It does not guarantee that the wall will never need investigation or maintenance.
Frequently asked questions
Is a rainscreen the same thing as housewrap?
No. Identify the cladding, space, water-resistive barrier, flashing and discharge details as a coordinated assembly rather than treating one wrap product as the complete system.
Does a drainable space prove that the cavity is well ventilated?
No. Drainage and ventilation are different functions. Ask for the intended air path, openings and applicable details as well as the liquid-water route.
Is there one cavity depth that works for every cladding?
No. Use the applicable product and project documents, including their scope, revisions and local requirements. A dimension from one manufacturer example is not a universal wall specification.
What should be documented before the cladding covers the wall?
Record critical junctions and transitions, applicable details, location-labeled evidence, approved changes and the person responsible for checking the work.
Sources and scope
Primary sources checked October 27, 2026: PNNL drainage-plane guide and base-of-wall flashing guide; Building Science Corporation BSD-013, August 2011 and RR-0905, September 2009; and the James Hardie multifamily/commercial drainage guide marked April 11, 2022, with its technical-document route. Captures, access limitations and dates are retained in the source audit. No product recommendation, current code determination, attachment design, site diagnosis, assembly certification, outside professional review or hands-on testing is claimed.
AI tools assisted with drafting. ClearTrade Report Editorial Team checked the cited sources and edited this guide. No hands-on inspection or testing was performed.
Need a qualified professional?
Trusted Pros uses visible license-verification states and never ranks paid listings above unpaid listings.